Mainly explain the functions of each button on the operation panel of the machining center, so that students can master the adjustment of the machining center, the preparation work before processing, and the methods of input and modification of the program. Finally, taking a specific component as an example, the basic operation of machining parts on a machining center was explained, giving students a clear understanding of the operation of machining centers.
 1, Processing requirements
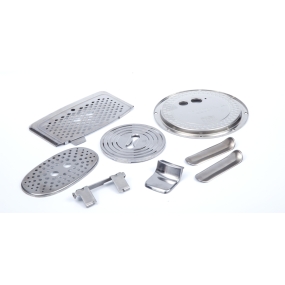
Processe partes sicut in sequente figura monstratae sunt. Materium component is LY12 est, quam singulam partem produit. Vasco partee in magnitudine machinata est.
Equipment selection: V-80 machining center
2, Preparation work
Complete relevant preparation work before processing, including process analysis and route design, selection of cutting tools and fixtures, programming, etc.
 3, Operation steps and content
1. Power on, manually return each coordinate axis to the machine origin
2. Tool preparation
Select a Φ 20 end mill, a Φ 5 center drill and a Φ 8 Fried Dough Twists drill respectively according to the processing requirements, and then clamp the Φ 20 end mill with the spring collet handle. The tool number is set as T01, and clamp the Φ 5 center drill and Φ 8 Fried Dough Twists drill with the drill collet handle. The tool number is set as T02 T03, Installa instrumentum inventoris in manipulo pulvere cargae et numerum instrumenti T04 pone.
3. Manually place the tool holder, and which has already been clamped, into the tool magazine
1) Enter "T01 M06" and execute
2) Manually install T01 tool on the spindle
3) Sequere gradus supra ad locum T02. T03 and T04 in the tool magazine in sequence
4. Clean the workbench, install fixtures and workpieces
Clear the flat mouth vise and install it on a clean workbench. Use a dial gauge to align and level the vise and then install the workpiece on the vise.
5. Utrum instrumentum pone determine and input the parameters of the workpiece coordinate system
1) Uter inventor termini ut instrumentum alignet et determinare valores nullos bias in directionibus X et Y. Adjuste valores bias nullos in directionibus X et Y.
Introducio in systemam coordinatum operationis G54, ubi nullus in directo Z positus est 0;
2) Pone positor Z-axis super superficiem partes operae, call out No. 1 tool from the tool magazine and install the spindle, use this tool to determine the Z-direction zero offset value of the workpiece coordinate system, and input the Z-direction zero offset value into the length compensation code corresponding to the machine tool. The "+" and "-" numbers are determined by G43 and G44 in the program. If the length compensation command in the program is G43, enter the Z-direction zero offset value of "-" into the length compensation code corresponding to the machine tool;
3) Uter eiusdem gradibus ut inveneris Z-direction nullus gradus ex instrumentis 2 et 3 in correspondent longitudine codica compensationis instrumenti machinae.
6. Programma procedentis ingressus
Transferte programmam machinationis generatum computatorium in memoriam systemae CNC instrumenti per cablum datum.
7. Debugging and processing programs
Debugging is carried out by translating the workpiece coordinate system along the+Z direction, i.e. lifting the tool.
1) Debug the main program and check whether the three cutting tools have completed the tool change action according to the process design;
2) Debuere three subroutines qui correspondent ad tres instrumenta secessionis, et verificare si actiones instrumentorum et semitas machinationis rectas sunt.
8. Automatic processing
After confirming that the program is correct, restore the Z value of the workpiece coordinate system to its original value, set the fast moving magnification switch and cutting feed magnification switch to low gear, press the CNC start button to run the program, and start machining. Attention ad observandum viam instrumentorum et distancem remanentem moventium dum procedura machinatorium.
9. Remove the workpiece for inspection
Select a vernier caliper for size inspection, and conduct quality analysis after inspection.
10. Redige locum processionis
11. Claude


 English
 Spanish
 Arabic
 Portuguese
 Belarusian
 Japanese
 Russian
 Icelandic
 Bulgarian
 Azerbaijani
 Estonian
 Irish
Irish Polish
 Persian
 Boolean
 Danish
 German
 French
 Filipino
 Finnish
 Korean
 Dutch
Dutch Galician
 Catalan
 Czech
Czech Croatian
 Latvian
 Romanian
 Maltese
 Malay
Malay Macedonian
 Norwegian
 Swedish
 Serbian
 Slovak
 Slovenian
 Swahili
 Thai
Thai Turkish
 Welsh
Welsh Urdu
Urdu Ukrainian
 Greek
Greek Hungarian
 Italian
 Yiddish
 Indonesian
 Vietnamese
 Haitian Creole
 Spanish Basque


