English
 Spanish
 Arabic
 French
 Portuguese
 Belarusian
 Japanese
 Russian
 Malay
Malay Icelandic
 Bulgarian
 Azerbaijani
 Estonian
 Irish
Irish Polish
 Persian
 Boolean
 Danish
 German
 Finnish
 Korean
 Dutch
Dutch Galician
 Catalan
 Czech
Czech Croatian
 Latin
Latin Latvian
 Romanian
 Maltese
 Macedonian
 Norwegian
 Swedish
 Serbian
 Slovak
 Slovenian
 Swahili
 Thai
Thai Turkish
 Welsh
Welsh Urdu
Urdu Ukrainian
 Greek
Greek Hungarian
 Italian
 Yiddish
 Indonesian
 Vietnamese
 Haitian Creole
 Spanish Basque

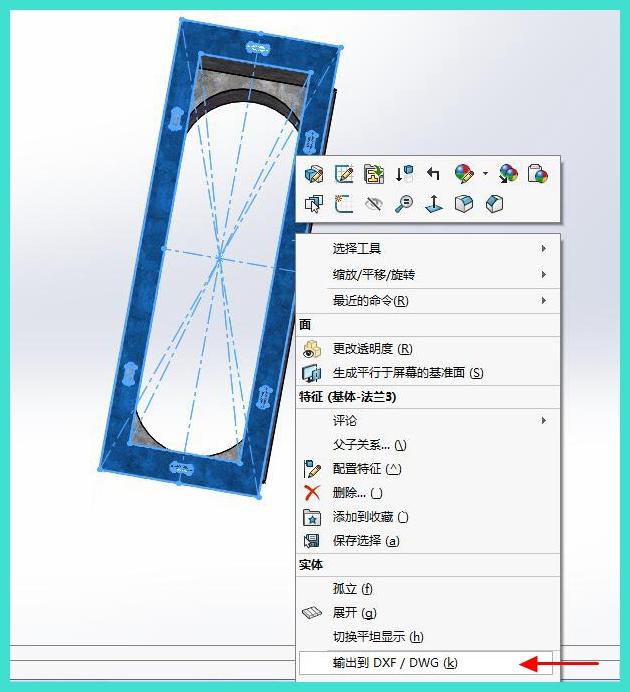
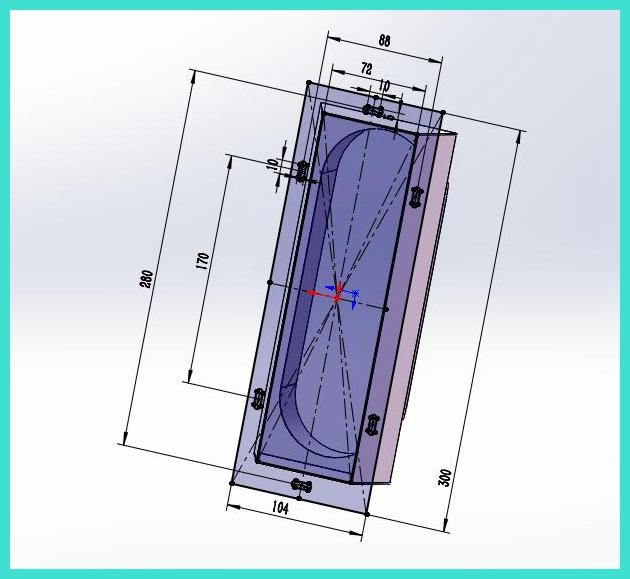
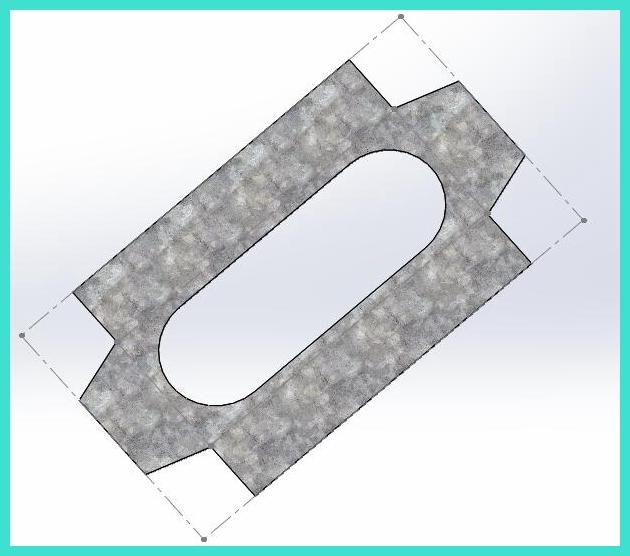
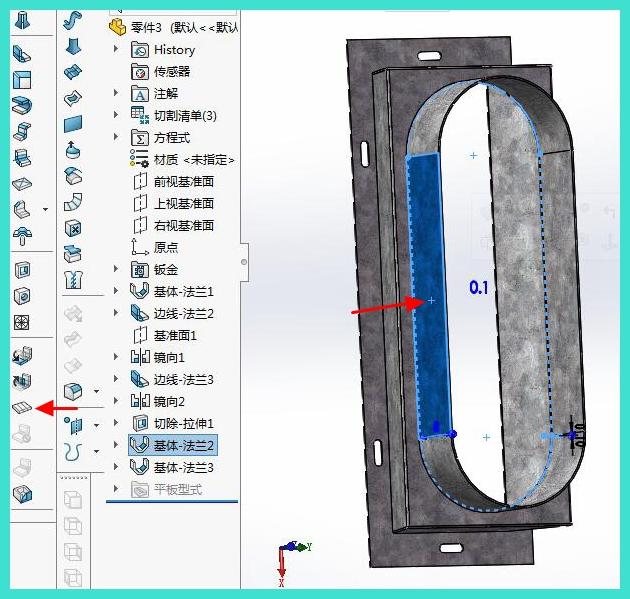
Ang sumusunod na larawan ay nagpapakita ng bahagi ng sheet metal ng air duct joint. Ipinaliwanag ng artikulo na ito kung paano gumawa at i-unfold ang sheet metal na ito? Ang focus ng artikulo na ito ay sa pagguhit ng middle edge flange!
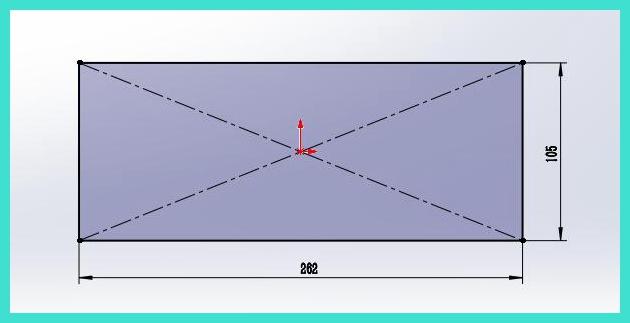
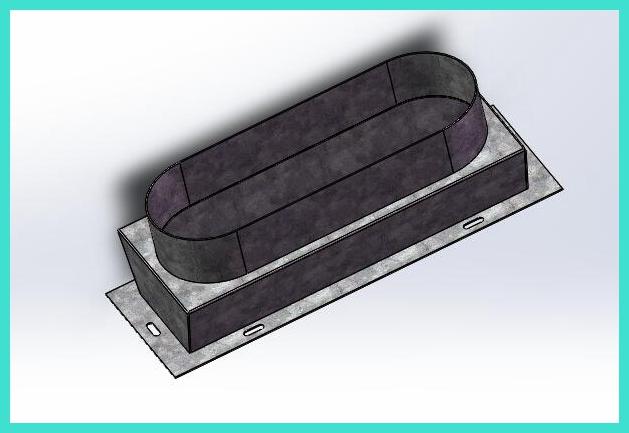
3D larawan: 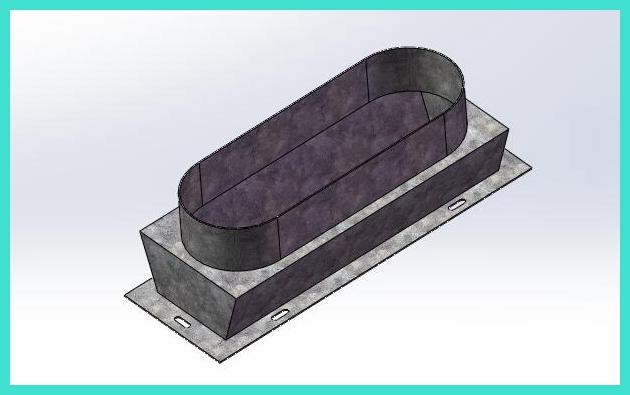
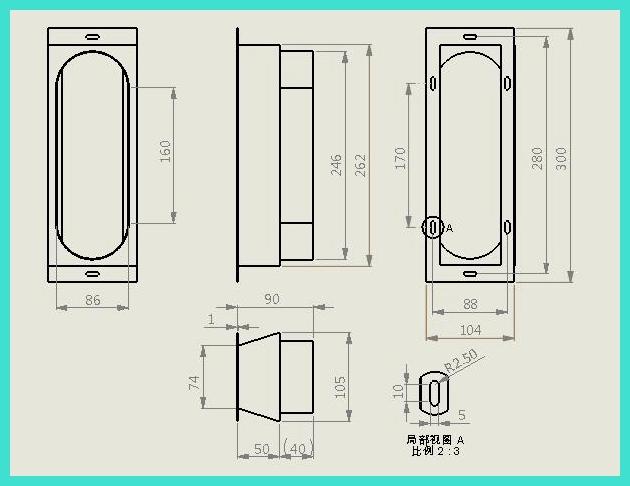
Pagguhit ng 2D engineering:
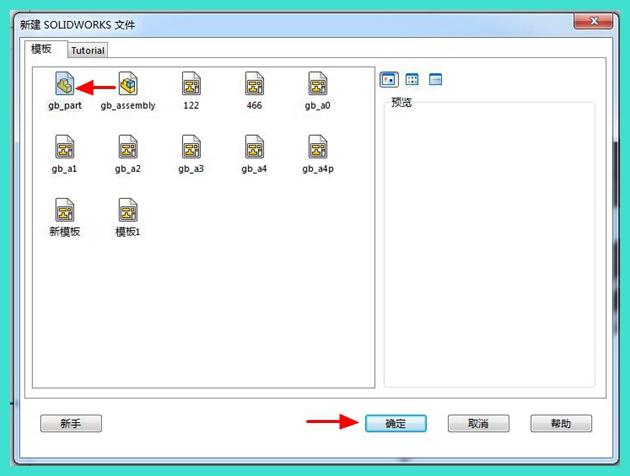
Ang mga hakbang ng pagguhit ay tulad ng mga sumusunod: 1. Buksan ang SolidWorks software, 【 Bagong 】 - 【 Mga Bahagian 】
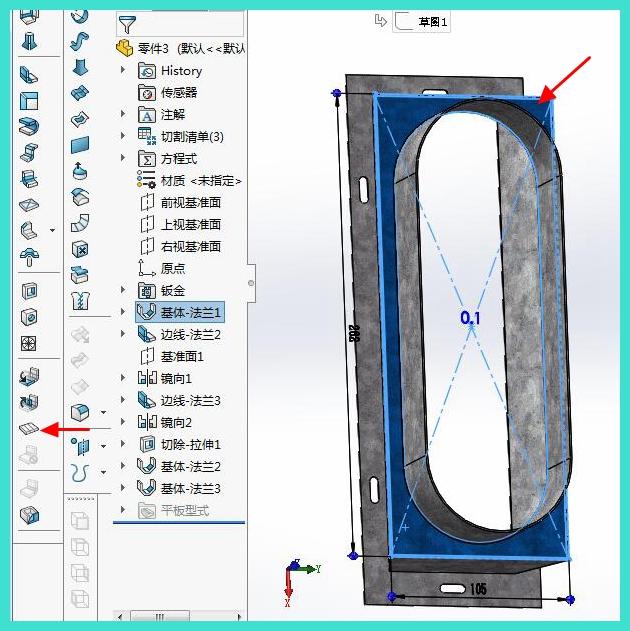
Una, iguhit ang base flange ng gitna na bahagi 762 * 105. Mag-click sa [Sketch] upang gumuhit muna ang sketch
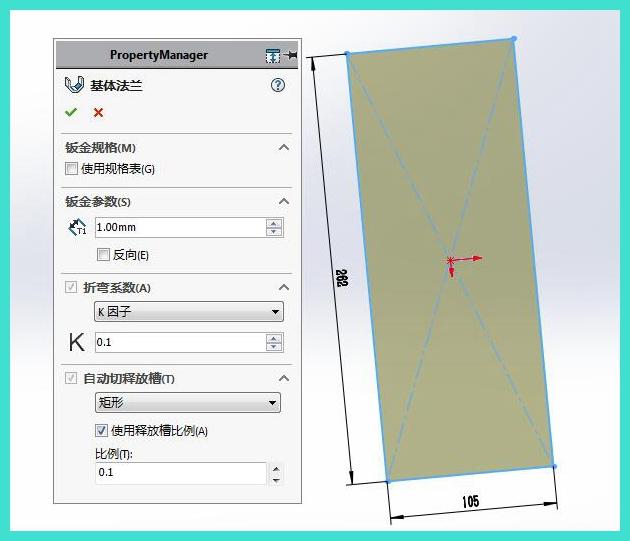
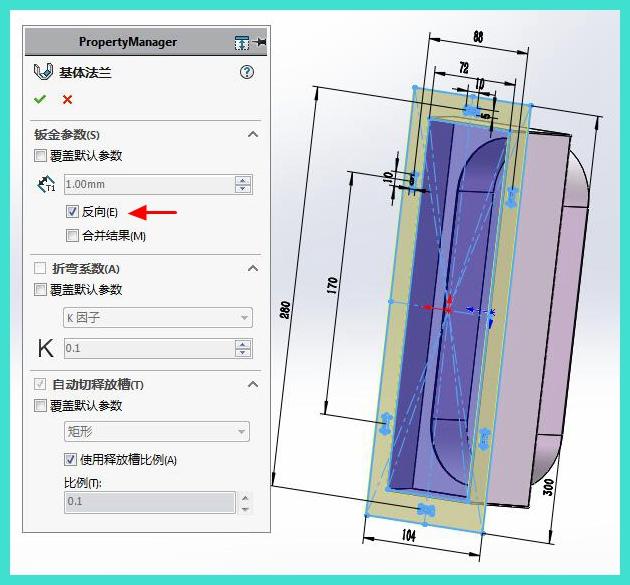
3. Mag-click sa "Base Flange" upang itakda ang thickness ng plate sa 1mm, at unang itakda ang koeficiente ng bending sa isang K factor ng 0.1. 90 degrees bending, large arc bending, set bending coefficient separately
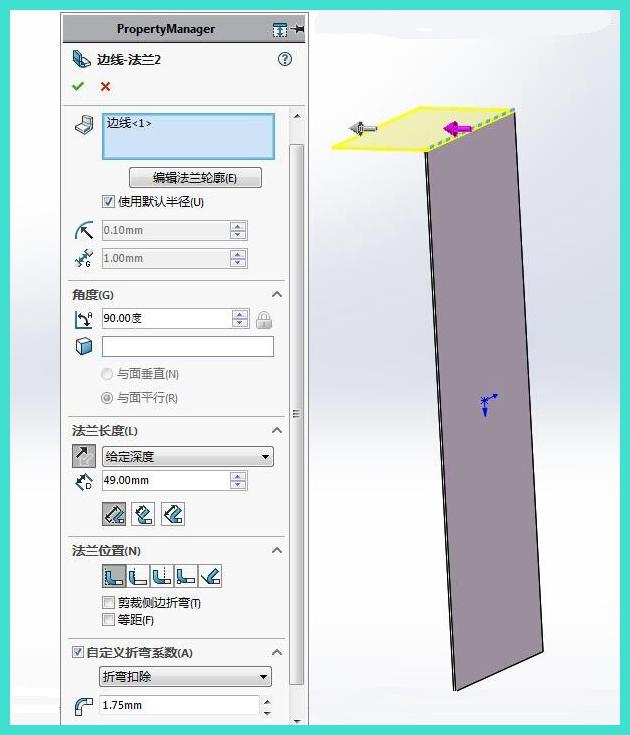
4. Click on [Edge Flanges] to set the angle to 90 degrees and depth to 49 degrees, and deduct 1.75 for bending
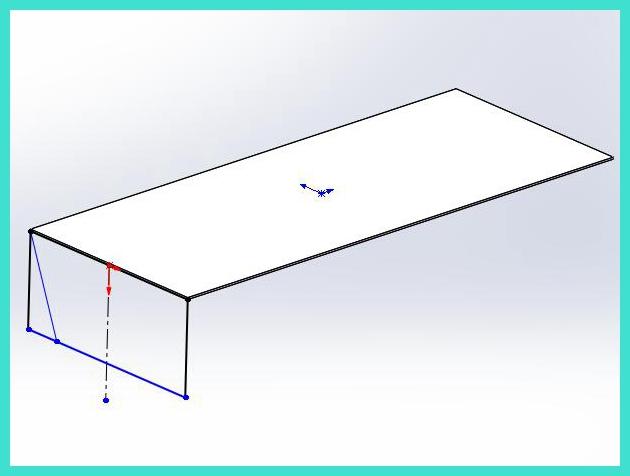
5. I-edit ang sketch ng flange ng gilid
6. Mag-click sa [Mirror]
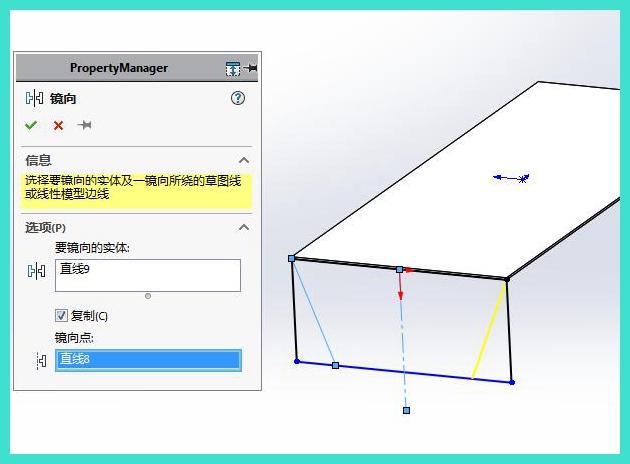
7. Click on the dimension annotation to generate the edge flange
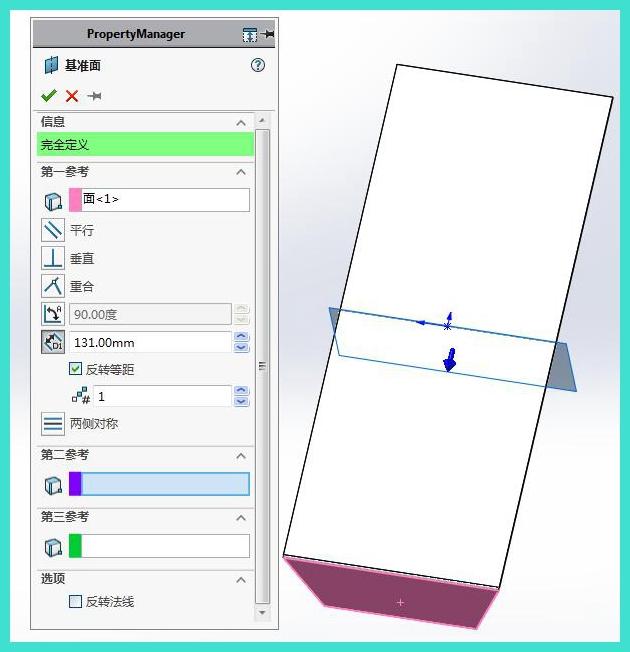
8. Mag-click sa [Reference Surface] upang lumikha ng bagong reference surface na may distansya ng offset na 131mm
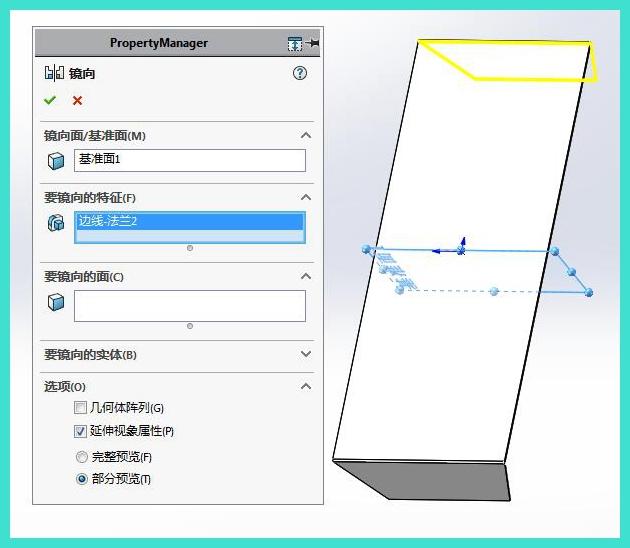
9. Mag-click sa "Mirror" para piliin ang bagong reference plane 1 para sa mirror reference plane, at piliin ang flange ng gilid para sa feature na mirrored
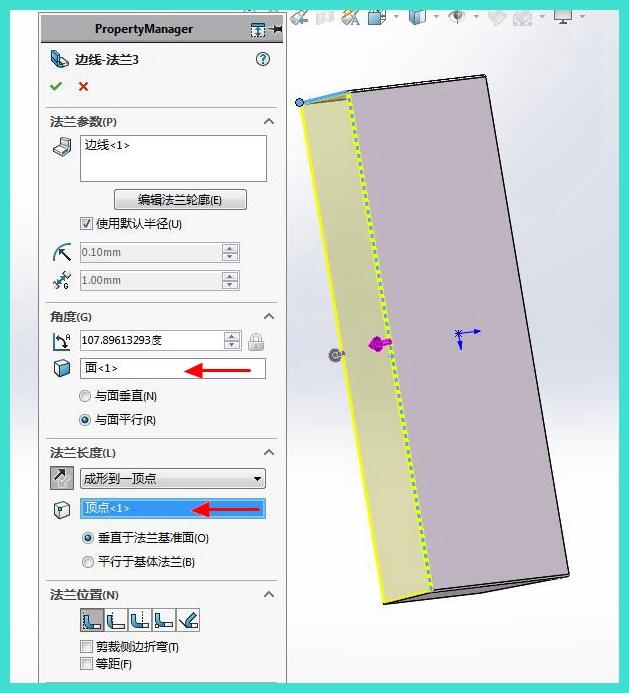
10. Click on the "Edge Flanges" button. The arrow in the figure below is the key setting point
11. Mag-click sa reference plane ng [Mirror] upang piliin ang itaas na reference plane, at piliin ang flange ng gilid ng nakaraang hakbang para sa feature na mirrored

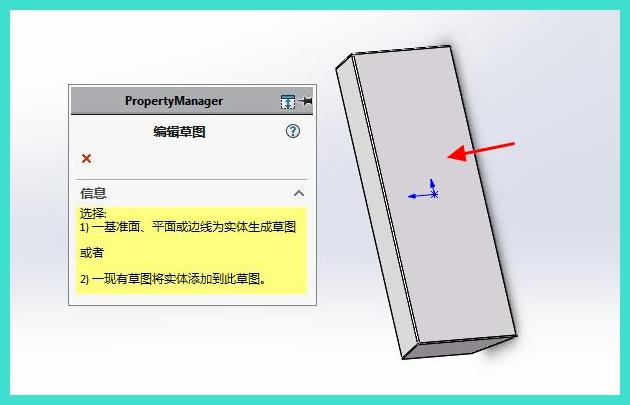
12. Click on [Sketch] to draw the sketch reference plane and select the plane indicated by the arrow
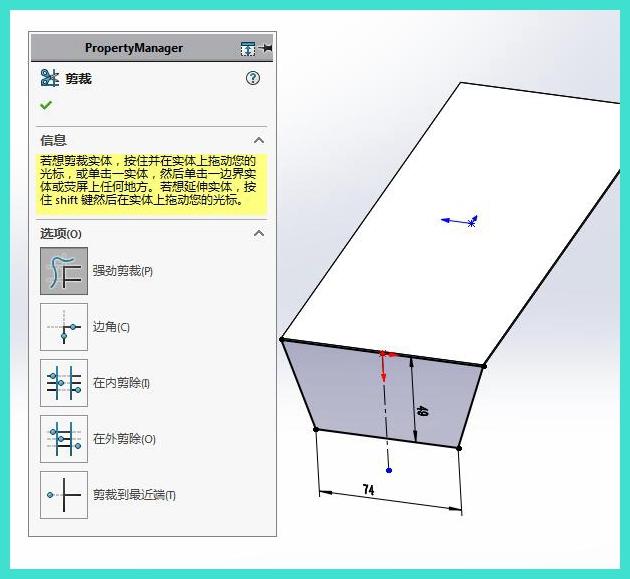
13. Gumuhit ng pagpapalawak at pagputol ng sketch
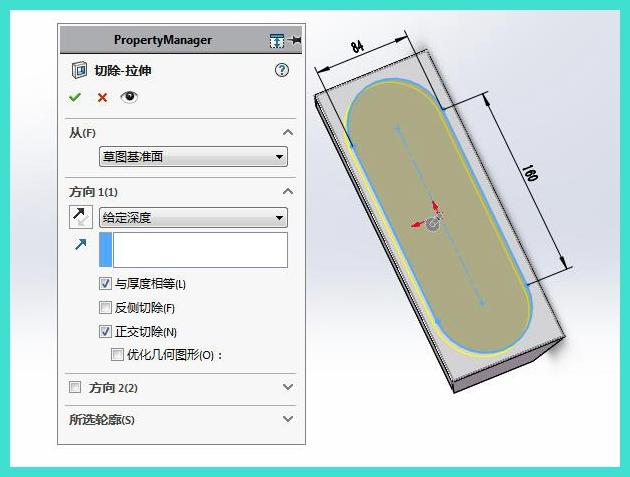
14. Click on stretch cutting and set parameters
15. Click on [Sketch] to draw the sketch reference plane and select the plane indicated by the arrow
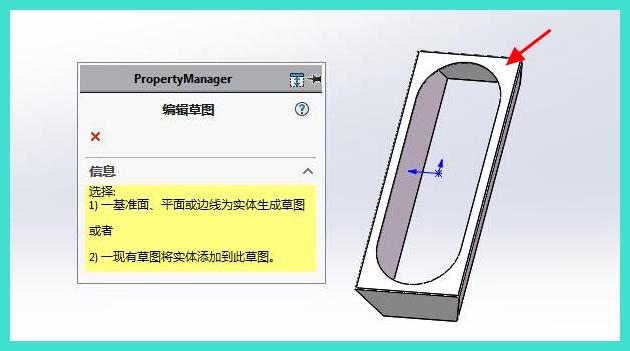
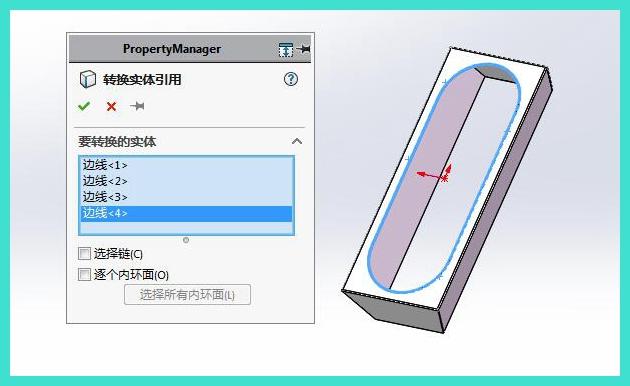
16. Guhit ng sketch at pindutin ang 'Entity Conversion Reference' upang piliin ang linya ng gilid para sa pagpapalawak at pagputol
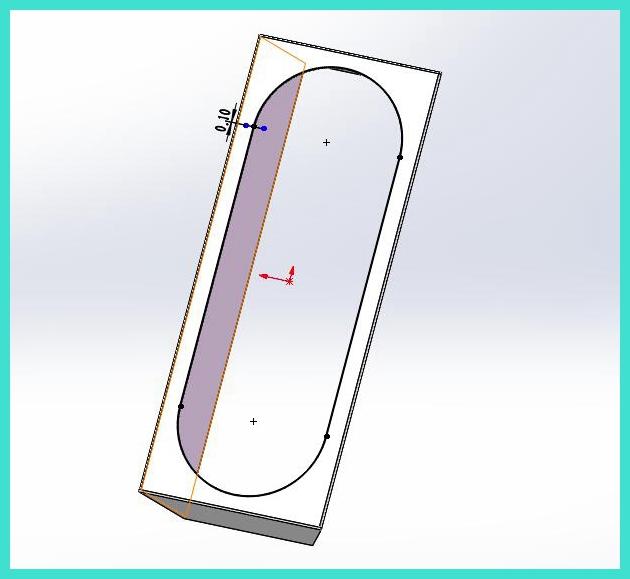
17. Gawin mo ang gap sa nasabing sketch
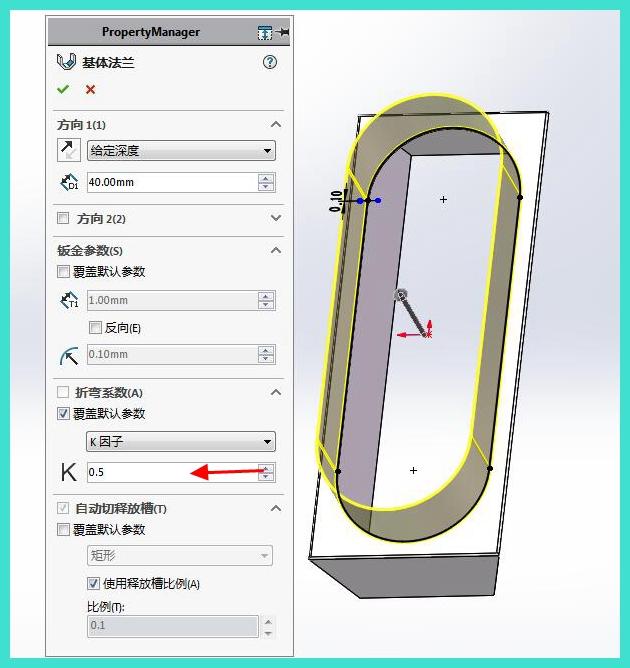
18. Mag-click sa [Base Flange] upang itakda ang depth. 40. Mag-set ng K factor sa 0.5 upang lumikha ng base flange
19. Click on [Sketch] to draw the sketch reference plane and select the plane indicated by the arrow
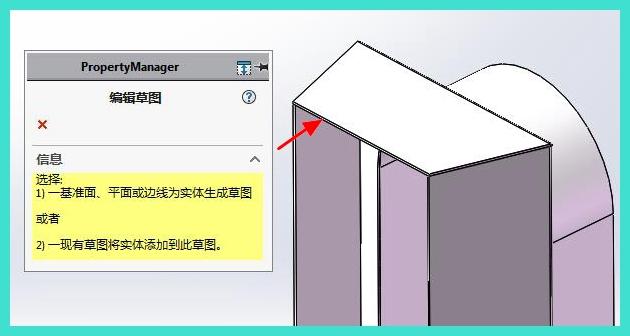
20. Guhit ng sketch ng base plate
21. Mag-click sa [Base Flange] upang lumikha ng base plate
22. Pagkuha nito
23. Piliin ang mukha sa sumusunod na larawan at i-click upang palawakin ito
24. Maglikha ng pagpapalawak
25. Mag-click sa larawan sa ibaba at mag-click para palawakin
26. Maglikha ng pagpapalawak
27. Ang plato sa ilalim ay hindi baluktot. Kanan-click sa ilalim ng panel at pindutin ang arrow sa ibaba upang direktang lumikha ng CAD