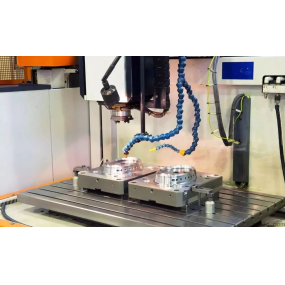
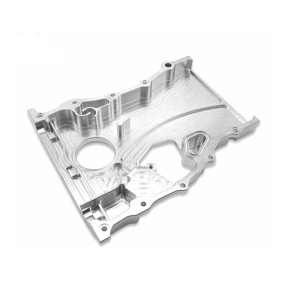
1、 High demand rotating parts 1 Parts with high precision requirements, due to the good rigidity of CNC lathes, have high manufacturing and tool setting accuracy, and can be easily and accurately machined

Work compensation or even automatic compensation, so it can process parts with high dimensional accuracy requirements. Generally speaking, turning parts with seven levels of dimensional accuracy should not be difficult. In some situations, cars can replace grinding. In addition, due to the high-precision interpolation operation and servo drive of the tool movement during CNC turning, coupled with the good rigidity and high manufacturing accuracy of the machine tool, it can process parts with high requirements for straightness, roundness, and cylindricity of the generatrix. The shape of arcs and other curve contours is much closer to the target geometric shape on the drawing than that of a copying lathe. Parts with curved generatrix shapes are often inspected using CNC wire cutting and slightly polished templates. The shape accuracy of parts produced by CNC turning will not be inferior to the shape accuracy of the prototype itself. CNC turning is particularly effective in improving positional accuracy. Many parts that require high positional accuracy cannot be turned with traditional lathes and can only be compensated for by subsequent grinding or other methods. The accuracy of the position of turning parts mainly depends on the number of times the parts are clamped and the manufacturing accuracy of the machine tool. If high positional accuracy is found during machining on a CNC lathe, it can be corrected by modifying the data in the program, which can improve its positional accuracy. However, it is not possible to perform this correction on traditional lathes. 2. A rotary CNC lathe with good surface roughness can process parts with low surface roughness, not only due to the rigidity and high manufacturing accuracy of the machine tool, but also due to its constant linear speed cutting function. When the material, precision machining allowance, and cutting tool have been determined, the surface roughness depends on the amount of feed and cutting speed. When turning the end face on a traditional lathe, due to the constant speed during the cutting process, theoretically only a certain diameter has the smallest roughness. In fact, it can also be observed that the roughness inside the end face is inconsistent. By using the constant linear speed cutting function of a CNC lathe, the optimal linear speed can be selected to cut the end face, resulting in a small and consistent roughness. CNC lathes are also suitable for turning parts with different surface roughness requirements. Areas with low roughness can be achieved by reducing the amount of cutting, which is not possible on traditional lathes. 3. Ultra precision and ultra-low surface roughness parts such as magnetic disks, recording machine heads, multi sided reflectors for laser printers, optical equipment such as rotary drums for copiers, lenses and molds for cameras, as well as contact lenses, require ultra-high contour accuracy and ultra-low surface roughness. They are suitable for processing on high-precision and high-performance CNC lathes. Lenses used for plastic astigmatism that were previously difficult to process can now also be processed using CNC lathes. The contour accuracy of ultra precision machining can reach 0.1 μ m, and the surface roughness can reach 0.02 μ m. The minimum setting unit of the CNC system used for ultra precision machining should reach 0.01 μ m. The material of ultra precision turning parts used to be mainly metal, but now it has expanded to plastic and ceramics. 2、 Due to the linear and circular interpolation functions of CNC lathes, some CNC devices also have some non circular curve interpolation functions. Therefore, it is possible to turn complex shaped rotary parts composed of arbitrary straight lines and planar curves, as well as parts with difficult to control dimensions, such as shell parts with closed inner forming surfaces. The forming surface of the enclosed inner cavity of the shell component shown in Figure 5-1 has a small mouth and a large belly, which cannot be machined on a regular lathe, but is easily machined on a CNC lathe. The curves that make up the contour of the parts can be described by mathematical equations or listed curves. For contours composed of straight lines or arcs, directly utilize the straight line or arc interpolation function of the machine tool. For contours composed of non circular curves, non circular curve interpolation function can be used; If the selected machine tool does not have curve interpolation function, it should be approached with a straight line or arc first, and then interpolated and cut with the straight line or arc interpolation function. If both traditional lathes and CNC lathes can be used for turning circular and conical parts, then CNC lathes can only be used for turning complex shaped rotating parts.


 Spanish
 Arabic
 French
 Portuguese
 Belarusian
 Japanese
 Russian
 Malay
Malay Icelandic
 Bulgarian
 Azerbaijani
 Estonian
 Irish
Irish Polish
 Persian
 Boolean
 Danish
 German
 Filipino
 Finnish
 Korean
 Dutch
Dutch Galician
 Catalan
 Czech
Czech Croatian
 Latin
Latin Latvian
 Romanian
 Maltese
 Macedonian
 Norwegian
 Swedish
 Serbian
 Slovak
 Slovenian
 Swahili
 Thai
Thai Turkish
 Welsh
Welsh Urdu
Urdu Ukrainian
 Greek
Greek Hungarian
 Italian
 Yiddish
 Indonesian
 Vietnamese
 Haitian Creole
 Spanish Basque

