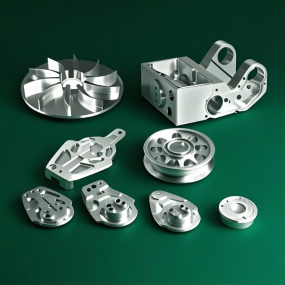
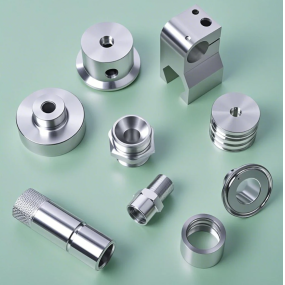
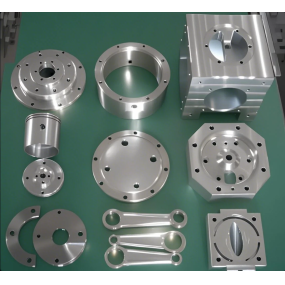
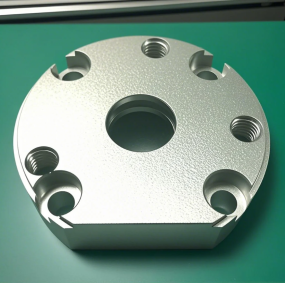
Everyone knows that in the aviation industry, aluminum alloy materials are extensively used to reduce the weight of aviation components themselves. However, in the precision machining of aluminum alloys, due to the relatively large coefficient of material expansion, deformation is prone to occur during thin-walled machining, especially when using free forging blanks with large machining allowances, making the problem of deformation even more prominent.
1、 Reasons for causing processing deformation
There are actually many reasons for the deformation of aluminum alloy parts during processing, which are related to the material, shape of the parts, and various production conditions, such as the performance of cutting fluid. In summary, it roughly includes the following points: internal stress deformation of the blank, cutting force, cutting heat, and deformation caused by clamping.
2、 Process measures to be developed to reduce machining deformation
1. To reduce the internal stress of the blank
We can use natural or artificial aging and vibration treatment to partially eliminate the internal stress of the blank. Pre processing is also an effective process method. For larger blanks, due to the large margin, there is also significant deformation after processing. If we pre process the excess parts of the blank and reduce the margin of each part, not only can we reduce the machining deformation in future processes, but we can also release some internal stress after pre processing and leaving it for a period of time.
2. Can improve the cutting ability of cutting tools
The material and geometric parameters of cutting tools have a significant impact on cutting force and cutting heat, and the correct selection of cutting tools is crucial for reducing machining deformation of parts.
① Reasonably choose the geometric parameters of the cutting tool
Front angle: While maintaining the strength of the blade, choosing a slightly larger front angle can not only sharpen the cutting edge, but also reduce cutting deformation, making chip removal smoother, and ultimately reducing cutting force and heat. Never use tools with negative front angles.
Rear corner: The size of the rear corner has a direct impact on the wear of the rear cutting surface and the quality of the machined surface. The cutting thickness is an important condition for selecting the back angle. During rough milling, due to the large feed rate, heavy cutting load, and high heat generation, good tool heat dissipation conditions are required. Therefore, a smaller back angle should be chosen. During precision milling, it is required that the cutting edge be sharp, reducing the friction between the back cutting surface and the machining surface, and minimizing elastic deformation. Therefore, a larger back angle should be chosen.
Spiral angle: In order to ensure smooth milling and reduce milling force, the spiral angle should be selected as large as possible.
Lead angle: Reducing the lead angle appropriately can effectively improve the heat dissipation conditions and reduce the average temperature in the processing area.
② Improve tool structure
Reduce the number of milling cutter teeth and increase the chip space. Due to the high plasticity of aluminum alloy materials and significant cutting deformation during processing, a larger chip space is required. Therefore, it is preferable to have a larger chip groove bottom radius and fewer milling cutter teeth. For example, milling cutters with a diameter of less than 20mm use two teeth; It is better to use three teeth for milling cutters with a diameter of 30-60mm to avoid deformation of thin-walled aluminum alloy parts caused by chip blockage.
Precision sharpening teeth: The roughness value of the cutting edge of the teeth should be less than Ra=0.4um. Before using a new knife, it should be lightly ground with a fine oilstone in front and behind the teeth to eliminate any burrs and slight serrations left during sharpening. In this way, not only can cutting heat be reduced, but cutting deformation is also relatively small.
Strict control of tool wear standards: After tool wear, the surface roughness value of the workpiece increases, the cutting temperature rises, and the deformation of the workpiece increases accordingly. Therefore, in addition to selecting tool materials with good wear resistance, the tool wear standard should not exceed 0.2mm, otherwise it is easy to produce chip deposits. When cutting, the temperature of the workpiece should generally not exceed 100 ℃ to prevent deformation.
③ Improve the clamping method of workpieces
For thin-walled aluminum alloy workpieces with poor rigidity, the following clamping methods can be used to reduce deformation:
For thin-walled lining parts, if a three jaw self centering chuck or spring chuck is used to clamp radially, once loosened after processing, the workpiece will inevitably deform. At this point, the method of compressing the axial end face with good rigidity should be used. Using the inner hole of the component for positioning, make a threaded through shaft and insert it into the inner hole of the component. Use a cover plate to press the end face tightly and then back tighten it with a nut. When processing the outer circle, clamping deformation can be avoided, thereby achieving satisfactory machining accuracy.
When processing thin-walled thin plate workpieces, it is best to use vacuum suction cups to obtain evenly distributed clamping force, and then use smaller cutting amounts to process, which can effectively prevent workpiece deformation.
Additionally, the filling method can also be used. To increase the process rigidity of thin-walled workpieces, media can be filled inside the workpiece to reduce deformation during clamping and cutting processes. For example, injecting urea melt containing 3% -6% potassium nitrate into the workpiece, and after processing, immersing the workpiece in water or alcohol can dissolve and pour out the filling material.
④ Reasonably arrange the process
During high-speed cutting, due to the large machining allowance and intermittent cutting, vibration often occurs during the milling process, affecting machining accuracy and surface roughness. So, the CNC high-speed cutting process can generally be divided into:; Rough machining, semi precision machining, corner cleaning, precision machining and other processes. For parts with high precision requirements, sometimes secondary semi precision machining is required before precision machining. After rough machining, the parts can cool naturally, eliminating the internal stress generated by rough machining and reducing deformation. The remaining allowance after rough machining should be greater than the deformation, usually 1-2mm. During precision machining, the surface of the parts should maintain a uniform machining allowance, generally between 0.2-0.5mm, to keep the cutting tools in a stable state during the machining process. This can greatly reduce cutting deformation, obtain good surface machining quality, and ensure product accuracy.
3、 Operation skills
In addition to the reasons mentioned above, the operation method is also very important for the deformation of aluminum alloy parts during the processing.
(1) For parts with large machining allowance, in order to provide better heat dissipation conditions and avoid heat concentration during the machining process, symmetrical machining should be adopted. If there is a 90mm thick sheet material that needs to be processed to 60mm, immediately mill the other side after milling one side, and process it to the final size in one go, the flatness will reach 5mm; If repeated symmetrical machining is used, each side is machined twice to the final size, ensuring a flatness of 0.3mm.
(2) Reduce cutting force and cutting heat by changing cutting parameters. Among the three elements of cutting parameters, the back cutting amount has a significant impact on cutting force. If the machining allowance is too large and the cutting force of one pass is too high, it will not only cause deformation of the parts, but also affect the rigidity of the machine tool spindle and reduce the durability of the tool. If the amount of back cutting is reduced, it will greatly reduce production efficiency. However, in CNC Machining, high-speed milling can overcome this problem. By reducing the amount of back cutting and increasing the feed rate and machine speed accordingly, the cutting force can be reduced while ensuring machining efficiency.
(3) If there are multiple cavities on the sheet metal parts, it is not advisable to use the sequential processing method of one cavity per cavity during processing, as this can easily cause uneven force distribution and deformation of the parts. Adopting layered multiple processing, each layer is processed simultaneously to all cavities as much as possible, and then the next layer is processed to evenly distribute force on the parts and reduce deformation.
(4) Thin walled workpieces undergo deformation during machining due to clamping, which is difficult to avoid even during precision machining. To minimize the deformation of the workpiece, the clamping piece can be loosened slightly before the precision machining reaches the final size, allowing the workpiece to freely return to its original state. Then, it can be slightly compressed until it can hold the workpiece firmly (completely by hand feel), which can achieve the desired machining effect. In short, the point of application of clamping force is best on the supporting surface, and the clamping force should be applied in the direction of good rigidity of the workpiece. On the premise of ensuring that the workpiece does not loosen, the smaller the clamping force, the better.
(5) The order of cutting should also be carefully considered. Rough machining emphasizes improving machining efficiency and pursuing a cutting rate per unit time, usually using reverse milling. Cutting off excess material on the surface of the blank at the fastest speed and in the shortest time, forming the geometric contour required for precision machining. Precision machining emphasizes high precision and high quality, and it is advisable to use sequential milling. Because the cutting thickness of the teeth gradually decreases from the maximum to zero during milling, the degree of work hardening is greatly reduced, and the degree of deformation of the parts is also reduced.
(6) When processing parts with cavities, try not to let the milling cutter directly penetrate the part like a drill bit, which may result in insufficient chip space for the milling cutter, poor chip removal, overheating, expansion, tool breakage, and other adverse phenomena. First, use a drill bit of the same size or one size larger than the milling cutter to drill the hole, and then use the milling cutter for milling. Alternatively, the spiral cutting program can be produced using CAM software.
4、 The surface of the workpiece turns black
Aluminum oxidation processing and aluminum alloy casting are generally done using metal molds. Metal aluminum and aluminum alloys have good fluidity and plasticity, but they are prone to blackening during use due to the following reasons:
(1) Unreasonable process design. Improper cleaning or pressure inspection of aluminum alloy die-casting parts creates conditions for mold and blackening, accelerating the formation of mold.
(2) Internal factors of aluminum alloy. Many aluminum alloy die-casting manufacturers do not perform any cleaning treatment after die-casting and machining processes, or simply rinse with water, which cannot achieve thorough cleaning. There are residual corrosive substances such as release agents, cutting fluids, saponification solutions, and other stains on the surface of die-casting aluminum, which accelerate the speed of mold growth and blackening of aluminum alloy die-casting parts.
(3) Inadequate warehouse management. Storing aluminum alloy die-casting parts at different heights in the warehouse results in varying degrees of mold growth.
(4) External environmental factors of aluminum alloy. Aluminum is a reactive metal that is highly prone to oxidation, blackening, or mold growth under certain temperature and humidity conditions, which is determined by the characteristics of aluminum itself.
(5) Improper selection of cleaning agents. The selected cleaning agent has strong corrosiveness, causing corrosion and oxidation of die cast aluminum.


 Spanish
 Arabic
 French
 Portuguese
 Belarusian
 Japanese
 Russian
 Malay
Malay Icelandic
 Bulgarian
 Azerbaijani
 Estonian
 Irish
Irish Polish
 Persian
 Boolean
 Danish
 German
 Filipino
 Finnish
 Korean
 Dutch
Dutch Galician
 Catalan
 Czech
Czech Croatian
 Latin
Latin Latvian
 Romanian
 Maltese
 Macedonian
 Norwegian
 Swedish
 Serbian
 Slovak
 Slovenian
 Swahili
 Thai
Thai Turkish
 Welsh
Welsh Urdu
Urdu Ukrainian
 Greek
Greek Hungarian
 Italian
 Yiddish
 Indonesian
 Vietnamese
 Haitian Creole
 Spanish Basque

